Good Morning All, Today I'd like to share with you a Mixed Media Canvas I've created for ColourCraftLTD using Metallic Acrylic Paint, DesignIT Paste, Brusho Crystal Colour Powders,Transfer Foils, Bondaweb and some goodies from my Craft Stash.
I wanted to play with layers and textures, and here's what I created;
Now let me share with you my process;
First of all I took an 8 inch by 10 inch canvas and gave it a couple of layers of Pink Metallic Acrylic Paint. I then added some Brusho Crystal Colour Powders in Lime Green and Alizarin Crimson and sprayed with water.
I then added some more Pink Metallic Acrylic Paint in places and once dry I added Lime Green DesignIT paste through a chevron stencil. I left this overnight to ensure the DesignIT paste was completely dry.
Whilst my canvas was drying I set about creating my focal points, which would be a mixture of different sized circles cut out of different papers. I then took some Transfer Foil along with my Fabric Master Tool and a piece of watercolour paper. I added random marks all over the paper until it was covered with foil.
I then sprinkled on some Lime Green Brusho Crystal Colour Powders and sprayed it with water. Once dry the Brusho Crystal Colour Powders had coloured all the unfoiled areas of the card, and left me with an awesome background.
Next I raided my craft stash for different textured papers I wanted to use; I found some cream and pink vellum along with some pink spiderweb sheets. I die cut three sizes of circles from all my papers, I also diecut some large circles from Bondaweb.
Using a hot dry iron I added my Bondaweb circles to my canvas. As I was ironing the foil to the Bondaweb circles I found some of the foil also adhered to the canvas and the DesignIt Paste. I like the effect it created, so added some more of the foil to various places on the canvas.
Using Stamp and Bond embossing powder I added a Cracked Background ( using a clear stamp from Crafty Roo Designs) to some of the vellum circles and then applied Bright Pink Foil. I added them all to my canvas. Then using a pokey tool I pierced holes along two of the circles so I could add stitching.
Here's a close up for you;
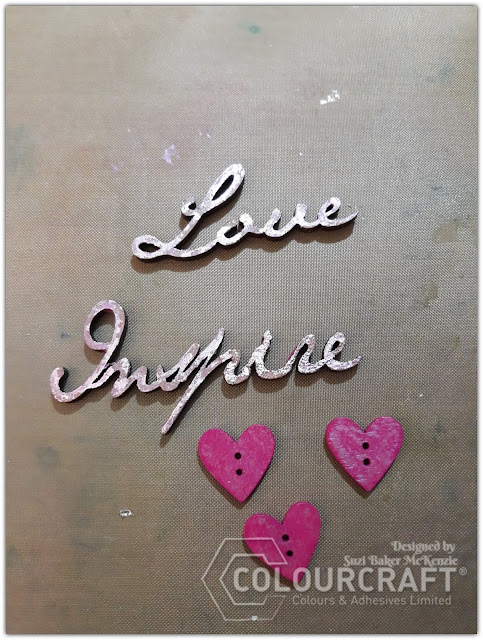
It was then time for me to decide on a sentiment for my canvas. I found a couple of mdf words in the stash, I added Silver foil to them with the Fabric Master Tool followed by some Pink Metallic Paint. I wiped away a little of the paint to enable the shine to come through from the foil. I also used this technique to add some Pink Metallic Paint to some Bright Pink Wooden Heart Buttons I had found in my stash.
I then set about adding some sewing to the canvas. I used Pale Pink Embroidery Floss on the Circles, and decided to add three rows of stitching to the background of the canvas, where I would add an additional vellum circle along with one of the wooden buttons. The wooden buttons where sewn on with Lime Green Embroidery Floss. I also added some Lime Green French Knots for a little extra texture/dimension.
Finally I glued on my MDF sentiment. Here's a couple of pictures of the finished canvas;
Here's a close up to show all the different textures;
This was such a fun project to work on. I discovered some great ways of adding foil using different heat sources, which I know I'll be using again. I really enjoyed adding some embroidered elements to the canvas too. It was great to find a use from some of the different papers I have in my craft stash. All in all it was a fun experimental piece, and I love the finished canvas. I hope you all like it too, and feel inspired to see what you have hiding in your stash that you can combine with the wonderful ColourCraft products; Don't forget to share your creations in the Create with ColourCraft Facebook Group, we love to see what you create.
Thanks for visiting with me today
Bye for now
Suzi
xxx


Comments